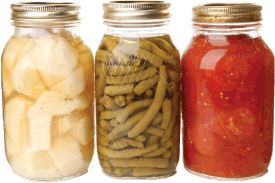
Putting it up: Easy ways to preserve produce
by Bill Thorness
This article was originally published in September 2010

Freezing and dehydrating are easier than canning and a great way to preserve some of our favorite summer foods that have a short season and seem to disappear all too soon. Freshness is key to the preserving process; be sure to choose produce at its peak.
Here are food preservation ideas, with tips from two local experts, Lorene Edwards Forkner, co-author of “Canning & Preserving Your Own Harvest” and Carey Thornton, educator at Seattle Tilth and Master Food Preserver.
Freezing
- Long-term storage requires a chest freezer that holds food at zero degrees.
- To avoid plastic freezer bags, choose glass jars, enamel casserole dishes, or stainless steel containers (sold at PCC). Be sure to allow plenty of space at the top when filling since freezing expands the contents. Or, freeze with the top off.
- Thoroughly cool cooked soups or sauces before freezing.
- Freeze in appropriate quantities: a couple of servings of pesto, two cups of beans, a quart of tomato sauce. Freeze in ice cube trays if you only need a few tablespoons at a time. When frozen, transfer to a covered storage container.
- Reduce whole foods to the size they’ll be used when thawed.
- Steam or blanch vegetables in boiling water before freezing, then dip into ice water to stop the cooking, and dry.
- If steaming greens, such as collards or spinach, chop first, cook briefly, then pack into a hard-sided container and pour steaming liquid over the top. Cool before covering and freezing.
- Make the food into its end product before freezing. Make tomato sauce instead of freezing whole tomatoes. Bake zucchini bread instead of freezing shredded zucchini.
- Make fruit sauce by simmering pitted/cored fruit in a pot until saucy (add a bit of water to prevent burning). Sweeten if desired and purée or leave chunky.
- Spread washed berries or sliced fruit in a single layer on a cookie sheet in the freezer, then pack after frozen.
Dehydrating
- Add dried fruit to salads, trail mixes and granola. Use dried vegetables in soups, casseroles, sauces, stuffings and stews.
- Commercial dehydrators, solar ones (see designs at builditsolar.com), or your oven can be used for drying. Oven-drying uses more energy than an efficient electric dehydrator.
- Oven temperature should be 120° F to dry but not cook the food. Use an oven thermometer to validate the temperature.
- Dried vegetables should be crispy or brittle, fruits should be pliable but not sticky or tacky. If they’re not entirely dried, store them in the refrigerator.
Other methods
- Fermentation by pickling vegetables is easy, especially if you just want to refrigerate the food for quick use. For longer storage use the hot-water-bath canning method.
- Basic pickling is done “by pouring a hot spiced vinegar solution over prepared ingredients,” says Forkner’s book. She advises following the pickling recipe carefully to get the proper acidity.
- You can pickle more than cucumbers: cantaloupe, figs, apples, pears, beets, beans, peppers, even watermelon rinds! See the National Center for Food Preservation: uga.edu/nchfp/index.html.
- Packing fruit into jars with alcohol and “steeping” it is another easy method that can result in a sweet, heady treat to use as a dessert topping.
- Make flavored vinegars or liquors. Infuse balsamic with strawberries or make raspberry schnapps.
Final thoughts
- Think about safety when putting up food, says Thornton. “Good handwashing! It sounds silly, but it’s important.” Use a clean kitchen and sanitized tools.
- When eating preserved food, use caution. Don’t eat anything with visual mold, odd colors, or an off smell.
- Hold a preservation party, says Thornton. “Have one of your friends go to a class and learn how to do it correctly, then come and teach the group how to do it in a safe way.”
Bill Thorness is the author of Edible Heirlooms: Heritage Vegetables for the Maritime Garden (Skipstone Press, 2009).
